We all know how important strength training is. It’s a great way to keep your body healthy and in tip-top shape. And if you’re a regular at the gym, you know how challenging and tiring strength training is.
Some people use pain as a way to judge how well their workouts are going. While a little bit of soreness can be good, severe and long-lasting pain isn’t something we’d actually encourage.
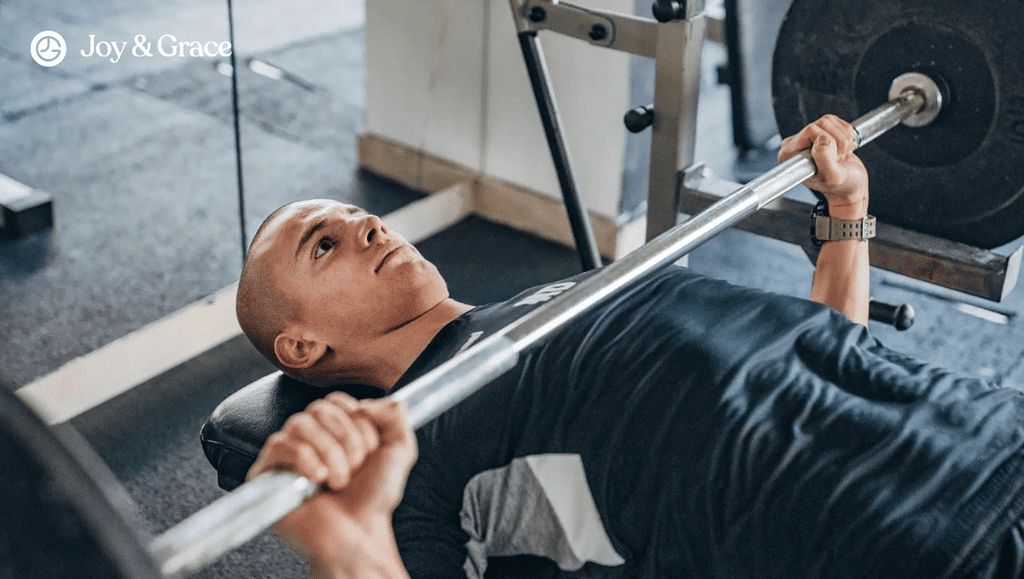
If you’ve ever experienced pain in the back of your shoulders while bench pressing, you’re certainly not alone. In this article, we talk about why bench pressing may hurt the back of your shoulders and give tips on how to avoid and deal with the pain.
Why Does The Back of My Shoulder Hurt When Bench Pressing?
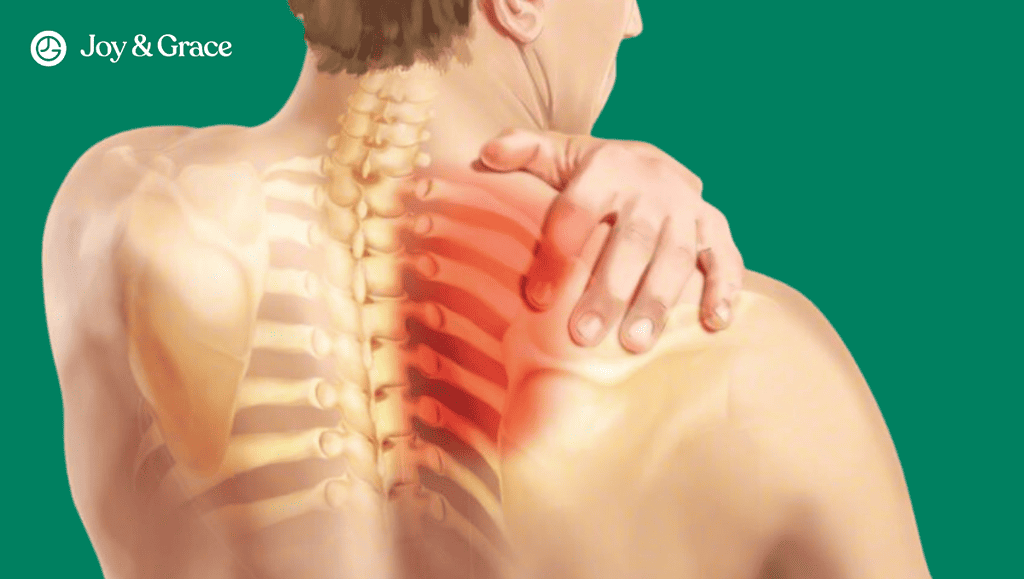
Shoulder pain can be very common among lifters. And while there are many potential causes, the most likely culprit is a combination of poor posture, improper form, and lifting too much weight. Pain can occur at the front, sides, and back of your shoulders. When pain occurs at the back or between your shoulders, it’s called interscapular pain.
Our shoulders are a highly complex part of our bodies. They are made up of many bones, muscles, and ligaments that all work together in perfect harmony to let us do many things, from brushing our hair to lifting heavy objects.
The shoulder joint is made up of your collarbone (clavicle), shoulder blade (scapula), and the bone of your upper arm (humerus). These bones are supported by a group of muscles called the rotator cuff.
Aside from the rotator cuff, your shoulders also have deltoids. The deltoids are what give people who work out a lot those nice, muscular shoulders. Other muscles that are also important for shoulder health include muscles of your chest and back.
When you perform a bench press or any exercise that includes the shoulder, with poor posture and improper form, you may injure these muscles. This can lead to pain in the back or between your shoulders. Injuries can range from strained muscles to full-blown tears in your rotator cuff.
Common Causes of Shoulder Pain When Bench Pressing
- Poor Form
Poor form can be one of the most common causes of shoulder pain when bench pressing. If you round your shoulders forward when you bench press, they will turn inward more.
This will pinch or put too much stress on the muscles in the rotator cuff, leading to pain and discomfort. To reduce the risk of injury and shoulder pain, make sure you use good form when bench pressing.
- Overuse
Overuse injuries are another thing that can happen with the bench press that can cause shoulder pain. These injuries aren't directly caused by poor form or bad bench press techniques. Instead, they are caused by doing the bench press too often without taking enough time to rest and recover between workouts.
Too much bench pressing can cause the muscles and joints of the shoulder to become overworked and inflamed. If you're bench pressing too often or with too much weight, you may be putting yourself at risk of shoulder pain.
Shoulder pain is just one sign of overused muscles and is usually accompanied by weakness and muscle fatigue.
If you already have injuries or weak muscles in your upper back and shoulders, pressing exercises are more likely to hurt you.
- Muscular Imbalances
Muscular imbalances can also cause shoulder pain when bench pressing. If your chest and shoulder muscles are not in balance, you may be placing too much stress on one muscle group, leading to pain and discomfort.
When you have a shoulder muscle that is stronger than the others, this muscle often ends up making up for the weaker muscles by working harder. You can think of the muscle as an overworked, stressed-out worker on your shoulder who gets less effective over time, even though they are working harder.
The stress that can result from compensating for the underperforming muscles may result in loss of function and pain.
What Does An Injured Trapezius Muscle Feel Like?
One of the most common muscles that end up compensating for weak shoulder muscles is the trapezius muscle. The trapezius muscle is a large, triangular muscle extending from the skull's base to the middle of the back. It is responsible for moving and stabilizing the shoulder blades and the upper part of the neck.
An injured trapezius muscle can cause a variety of symptoms, depending on the type and severity of the injury. Common symptoms of a trapezius injury include pain, stiffness, and weakness in the shoulder and neck. In some cases, the pain may radiate down the arm or up into the head.
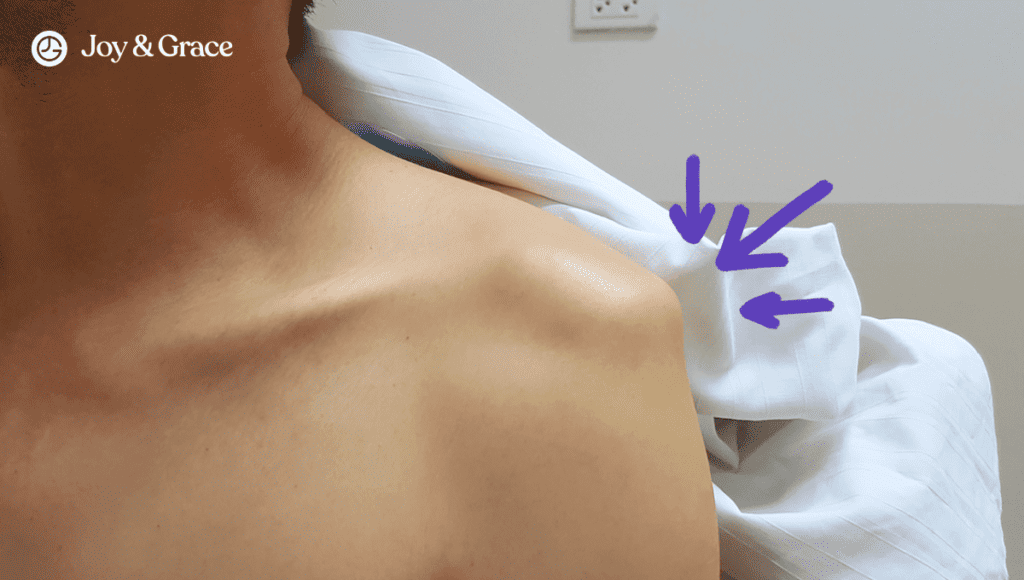
After prolonged stress, the trapezius muscle may weaken and result in “scapular winging.” When your shoulder blades wing out, they may end up pressing on the other tissues of the shoulder, causing pain.
If left untreated, it may lead to rotator cuff injuries such as rotator cuff tears and shoulder impingement syndrome.
In addition to these physical symptoms, an injured trapezius muscle can also cause a loss of range of motion in the shoulder and neck. This can make it difficult to perform everyday activities, such as reaching overhead or turning your head.
What Does An Injured Deltoid Feel Like?
Remember the deltoid? Well, the deltoid is the large, triangular muscle extending from the uppermost part of your arm to your shoulder. Your deltoid has three parts, the front deltoid, the middle deltoid, and the posterior (back) deltoid. It is responsible for arm and shoulder movements, such as abduction, flexion, extension, and rotation.
Overuse and improper form can cause injury to any part of the deltoid and lead to pain. Deltoid injuries are usually categorized into three grades:
- Grade I
A grade I strain means your shoulder may be tight or sore, but you can still move your arm normally. You may also notice a little bit of swelling.
- Grade II
Grade II strains are considered partial tears of the deltoid. You may notice difficulty moving or lifting your arm due to pain. Just like grade I strains, your deltoids may also be swollen.
- Grade III
Grade III is what classifies more extreme or even complete tears of your deltoids. In this grade, you’ll be experiencing severe and debilitating pain. You may be unable to move your arm at all, and your shoulder may be severely swollen.
How Does A Doctor Diagnose Shoulder Pain?
A doctor will usually ask you for a complete and detailed history of your shoulder pain. They will also do a routine physical examination, focusing on your shoulders. This may include some special tests to identify the cause of your shoulder pain.
We have an in-depth article about shoulder pain evaluation if you want to learn more.
How Do I Get Rid Of The Pain In My Shoulder When I Press?
You can easily avoid painful shoulders when bench pressing by making a few adjustments to your lifting routine. These include:
Warm-ups
It may seem like a chore, but warm-ups are really essential in any workout, especially bench pressing. Warm-ups can help reduce tension in your shoulder muscles and joints, preparing them for the exercise. This can be done through light cardio, dynamic stretching, foam rolling, or a combination of all three.
According to one study, warm-ups can help strengthen your muscles, improve your range of motion, and reduce the risk of injury.
Proper form
This is probably the most critical step in reducing shoulder pain when bench pressing. Focus on keeping your core engaged and back in a slight arch. Also, try to imagine squeezing your shoulder blades in order to keep the shoulders down.
Make sure you're using proper form when performing the bench press. Poor form can result in more stress on the shoulder and lead to pain and injury. We’ll talk more about this later on.
Strengthen your muscles
Strengthening the shoulder muscles and surrounding muscles can help avoid muscle imbalances. Shoulder presses and side raises are both great exercises for building muscle strength. This will help bring your shoulder and other muscles that support it into balance and make injuries less likely.
We’ll mention some of these strengthening exercises later in the article.
Adjust the weight
If the pain is persistent, try reducing the weight you're bench pressing. In fact, it’s best not to go too heavy with the weights at all. This may help reduce shoulder stress and allow you to bench press without pain. Remember, you're training your muscles, not your ego.
“It’s tricky to give an amount of weight because everyone is different. I suggest starting out light, then finding a weight you can lift for three sets of eight reps. At the end of the third set, if you feel like you’ve got two or three reps left in the tank, that’s a good starting point. It should feel challenging, but your form shouldn’t deteriorate.”
According to NSCA-accredited coach Andrew Reay
Consult a professional
If the pain persists after trying the above methods, it may be best to consult a physical therapist or another health professional for help. They can assess the issue and offer advice on reducing or eliminating the pain.
Following the above methods should reduce or eliminate the pain in the shoulder when bench pressing.
How Do I Perform A Bench Press Properly?
We’ve touched on proper bench press form earlier, but now it’s time to actually break down the exercise. These are what you need to consider to execute a bench press properly:
Don’t Ignore Your Feet
Although your feet seem insignificant during a bench press, they actually play a vital role. You see, your feet actually provide you with a strong and stable foundation from which you can draw power.
You should try to position your feet back toward your butt as far as you can while still keeping them flat on the ground. Now, this might look a little different for everyone depending on how tall you are and your body type, but the idea is to plant your feet firmly like tree roots so you can channel all that power from the ground up through your entire body.
Find The Right Spot Under The Bar
Now that we’ve got your feet ready for action, it's time to position yourself under the bar properly. Everyone's body is a little different, so your position might look a little unique to you. Considering that, just ensure you're far enough to unrack the bar easily. Your eyes should be under the bar.
Now, squeeze those shoulder blades together and push your upper back into the bench to help protect your shoulders. And remember, keep your head, shoulder, and hips pressed firmly on the bench!
Do The Arch
Okay, so we've got a little bit of a controversial topic on our hands here. Some bodybuilders out there might think that arching your back is just for powerlifters, but arching your lower back can actually do wonders for maintaining a neutral spine. This will help keep your back tight and protected from injury.
Now, if you're not really into the whole powerlifting thing, no worries—you don't have to go crazy with the arch. Just keep a slight arch in your lower back, and you'll be good to go. Just be sure to listen to your body and do what feels comfortable.
Mind Your Grip
When it comes to your grip, always aim for a shoulder-width grip on the bar to maintain the best position for pressing the weight up. If your grip is too wide, you might end up putting too much pressure on your shoulder joints. On the other hand, a too-narrow grip can strain your elbows.
Aside from spacing your grip correctly, make sure to grip the bar real tight as if your life depends on it (well, it actually does). When you’re doing a heavy set, you can also squeeze the bar before unracking it to really fire up your muscles.
Remember, never do a thumbless grip or a bench press with bent wrists.
Brace For Lift-Off
Now it’s time to unrack that bar and get lifting! Start with a strong lock-out position, where the bar is directly above your shoulders. Take a deep breath, then let it out as you lift the bar off the rack. And on that note, remember safety first! When it comes to the bench press, it's always a good idea to have a spotter on hand.
Spotters can help you lift the weight if you get stuck, and make sure you don't drop the bar on yourself. But if you don't have a spotter, no worries! Just be sure to stop well before failure so that you can safely re-rack the bar.
Lower The Bar
Alright, now that you've got the bar off the rack and in position, let's get ready to press! Take another deep breath and hold it as you brace your abdominal wall.
As you do this, try to imagine you're bending the bar into a U-shape with your hands. This will help you tuck your elbows naturally and engage those lats to protect your shoulders.
Hold that breath until you're past the sticking point of your press, then breathe out forcefully as you push through the rest of the movement. The sticking point is the position or part of the press in which you have extreme difficulty continuing lifting.
Touch Your Chest
Your position during the bottom portion of the bench press will depend on the length of your arms and your grip width. The main thing is to keep your forearm at a 90° angle from the ground and hit the middle of your chest.
You might touch the bar farther down your body if you’ve got long limbs coupled with a narrow grip. On the other hand, if you have short arms and a wide grip, the bar will touch higher up on your chest.
No matter where the bar hits you, try to aim for the same spot every rep to keep things consistent.
Push With Your Legs
Now that the bar has touched your chest, it’s time to restart and make that upward movement. Tighten those glutes and drive your legs into the ground to give yourself a little boost. This will allow you to keep your glutes and hamstrings engaged and press more weight.
As you reach the sticking point, remember to breathe out forcefully and think about throwing the bar back as you press up. And remember to keep those core and upper-body muscles tight as you lift.
And when you're finished, make sure to re-rack the bar carefully. We want to make sure it's secure before you release the tension in your arms. Trust us. You don't want to be chasing a rolling barbell around the gym.
What Are The Common Mistakes Beginners Make When Doing A Bench Press?
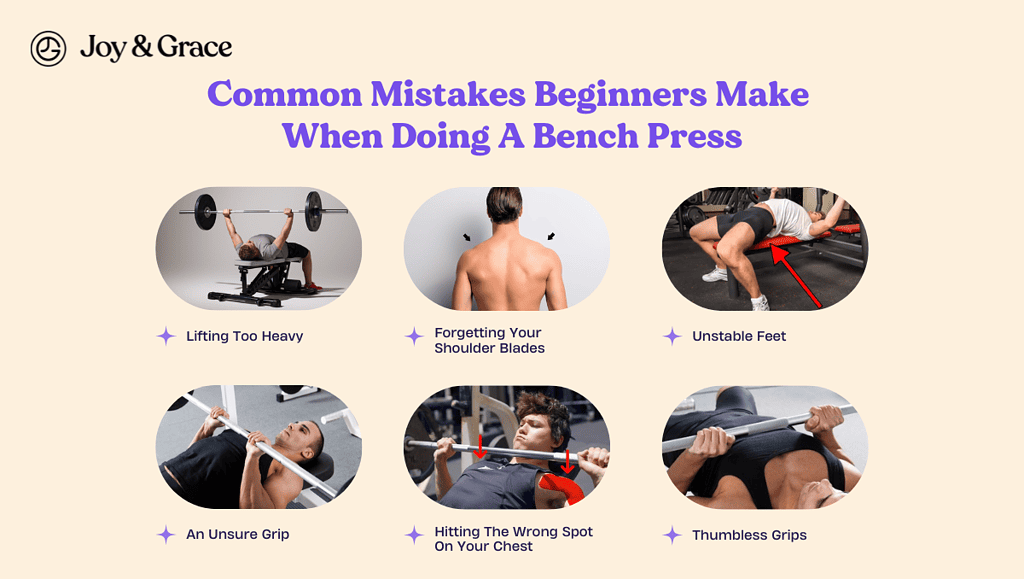
Lifting Too Heavy
As we mentioned earlier, you should always start with lighter weights. It's natural to want to lift as much weight as possible, but starting with a weight that you can handle comfortably is important.
If you try to lift more than you can, your form may suffer, and you may increase your risk of injury. So don't be afraid to reduce the load if necessary.
Forgetting Your Shoulder Blades
Proper shoulder blade position is key for stabilizing the barbell and preventing injury. Before you unrack the bar, pull your shoulder blades back and down. And as you press the bar up, imagine pushing yourself onto the bench instead of lifting the bar.
Unstable Feet
Again, your feet should be like the roots of a tree, firmly planted on the ground. If you find yourself moving your feet during the exercise, it's a sign that you're not as tight as you should be.
This can lead to form breakdown and increase the risk of injury. So it's important to make sure your feet are flat on the floor and push through them for the entire set. This will help you maintain proper form and maximize the effectiveness of the exercise.
An Unsure Grip
Consistency is key when it comes to grip width. If you're all over the place with your grip, it's like trying to hit a bullseye with a blindfold on. You never know where you're going to land!
But if you keep your grip width consistent, you'll be able to track your progress more accurately and see how much you've improved. Plus, your muscles will thank you for the consistency. They'll know exactly what to expect and can focus on doing their best work.
So don't be indecisive with your grip width; pick a spot and stick with it!
Hitting The Wrong Spot On Your Chest
When you lower the bar to your chest, make sure to touch it to the middle of your chest and avoid bouncing it off your sternum. And if you can't bring the bar all the way down, it might be time to lower the weight. Also, make sure the bar is moving in a diagonal line, not a vertical one.
Thumbless Grips
A thumbless grip may seem edgy, but it's actually quite risky. Not only is there a higher chance of dropping the bar, but you'll also miss out on the benefits of a proper grip.
Thumbless grips are so bad they’re even called “suicide grips.” So make sure to wrap your thumbs around the bar and squeeze it as hard as possible.
How Do I Address Shoulder Pain After Doing Bench Presses?
Rest
It’s important to have an adequate amount of rest in between workouts. When you bench press, you're subjecting the muscles of your shoulders, arms, and chest to significant stress. This stress causes tiny tears in your muscles.
These tiny tears are normal and are a part of the muscle-building process. However, for the muscles to repair and grow, they need time to rest. When you rest, you allow your body to repair the tears in your muscles, causing them to become stronger and larger.
You should take at least 48 hours off between bench press workouts to give your muscles time to recover and grow.
If you do not allow your muscles sufficient time to rest between workouts, they may not recover and rebuild fully. This can lead to reduced muscle growth and an increased risk of injury.
Ice and Compress
Putting ice on the area can help reduce swelling and pain, and applying pressure can help tired or sore muscles by improving circulation. Ice should be applied for 15-20 minutes at a time, and compression may be applied with an elastic bandage.
Painkillers
You can take over-the-counter painkillers like acetaminophen or ibuprofen to relieve the pain. Don’t worry; studies show that normal doses of these drugs do not interfere with your gains.
How Do I Return To Pressing Exercises With Shoulder Pain?
If you’ve been dealing with shoulder pain, you might be slightly apprehensive about returning to bench pressing. Depending on the severity of your shoulder pain, it may be best to consult a physical therapist before attempting any exercise.
As we mentioned earlier, it’s essential to do warm-ups before doing any pressing exercises. You can perform stretches, foam rolling, and light resistance exercises. This will help to increase blood flow to the area and prepare your shoulder for the exercises. After warm-ups, you'll want to stabilize your shoulder, specifically your rotator cuff muscles.
After performing warm-ups and strengthening exercises, you can progress toward pressing exercises. You can start by doing pressing exercises with light weights, such as dumbbells and resistance bands. Just make sure to perform these exercises in a slow and controlled manner.
When you find it easier to do the exercises, you can start increasing the weight and speed of your exercises. And remember, always practice proper form, even with light weights. This will help lessen the stress on your shoulder muscles and reduce the risk of injury.
Finally, always make sure to give your shoulder adequate rest in between workouts and allow your body to repair your muscles.
How Can I Strengthen My Shoulders?
In case we didn’t drive the point hard enough, it‘s crucial to strengthen your shoulders before going back to bench pressing. The American Academy of Orthopedic Surgeons has provided a great list of exercises to help strengthen and stabilize your shoulders.
These exercises are designed to help you return to daily activities and enjoy a more active, healthy lifestyle.
Before we start, it’s important to note that you shouldn’t feel any pain when performing these exercises. So if you’re ready to get those shoulders moving again, grab your dumbbells (or whatever you have lying around the house) and try the following:
The Pendulum exercise is a great way to strengthen the muscles in your shoulders, including the deltoids. This exercise requires no equipment – just a flat surface like a counter or table to support your weight.
- To begin, stand with your feet shoulder-width apart and lean forward slightly, placing one hand on a counter or table for support.
- Hang your arm at your side.
- Gently swing your arm forward and backward, then side to side, and finally, in a circular motion.
- Repeat the entire sequence with your other arm.
- Always have a straight back and bent knees when doing this exercise.
- Aim for 2 sets of 10 repetitions, 5 to 6 days per week.
The Crossover Arm Stretch is a simple exercise that targets the posterior deltoid muscles in your shoulders. You'll feel this stretch at the back of your shoulder. No equipment is needed for this exercise – just your body weight.
- Stand with your feet shoulder-width apart and relax your shoulders.
- Gently pull one arm across your chest and hold onto your upper arm with the opposite hand.
- Hold for 30 seconds before switching sides.
- Repeat the stretch 4 times on each side, 5 to 6 days per week.
This is a great way to stretch and strengthen the subscapularis muscles in your shoulders. You'll need a light stick like a yardstick or wooden ruler to do this exercise.
- Stand with your feet shoulder-width apart.
- Hold the stick behind your back with one hand, lightly grasping the other end of the stick with your other hand.
- Pull the stick horizontally, stretching your shoulder until you feel a pull without any pain.
- Hold the stretch for 30 seconds.
- Relax for 30 seconds before switching sides.
- Repeat the stretch 4 times on each side, 5 to 6 days per week.
- Make sure not to lean over or twist to the side while pulling the stick.
This is a great way to stretch and strengthen the muscles of your rotator cuff. You'll need your yardstick or ruler again.
- Stand with your feet shoulder-width apart and grasp the stick in front of you with one hand, cupping the other end with the other.
- Keep the elbow against the side of your body and push the stick horizontally.
- Hold the stretch for 30 seconds.
- Relax for 30 seconds before switching sides.
- Repeat the stretch 4 times on each side, 5 to 6 days per week.
- Make sure to keep your hips forward and do not twist.
This exercise requires no equipment – just a firm, flat surface like a bed or couch.
- Lie on the affected shoulder with your arm bent upwards at a 90° angle.
- You can have a pillow under your head for comfort.
- Use your other arm to push your injured arm down.
- Stop when you feel a stretch in the back of your affected shoulder.
- Hold this position for 30 seconds.
- Relax your arm for 30 seconds and then repeat.
- Make sure not to bend your wrist or press down on your wrist.
- Aim to do this stretch 4 times, 3 times a day, every day.
You'll need an elastic stretch band of comfortable resistance to do this exercise. You can also perform this exercise on a weight machine at a gym.
- Make a 3-foot-long loop with the band and attach it to a doorknob or other stable object.
- Stand in front of the doorknob, holding the band with your elbows bent at a 90° angle and raised at the level of your shoulders.
- With your elbows and shoulder aligned, slowly raise your hand until it is in line with your head.
- Slowly lower your arms and repeat the movement.
- Aim for 3 sets of 8 repetitions, 3 days per week. Make sure to keep your elbow in line with your shoulder as you do the exercise.
You will need a resistance band or a light dumbbell to do this exercise. Like the previous exercise, you can also do this with a weight machine at the gym. You will feel this exercise in your shoulders and chest.
- Make a 3-foot-long loop with the band and attach it to a doorknob or other stable object.
- Stand beside the doorknob, holding the band with one hand and your elbow bent at your side.
- With your elbows close to your side, bring your arm across your body.
- Slowly lower your arm back to your side and repeat.
- Aim for 3 sets of 8 repetitions per side, 3 days per week.
- Start by lying on a stable, flat surface on your affected arm.
- Place a pillow under your head so that your spine is straight.
- Hold the weight with the injured arm. Hold the weight horizontally at the starting position, with your elbows bent at a 90° angle.
- Keeping your elbow bent and against your body, and slowly rotate your injured arm to raise the weight to a vertical position.
- Slowly lower the weight back down. Be sure to keep proper form by keeping your elbow bent and against your body throughout the exercise.
Like the previous exercise, you will need a resistance band, light dumbbell, or weight machine.
- Make a loop with the elastic band and tie the ends together. Then attach the loop to a doorknob or other stable object.
- Stand beside the doorknob and hold the band with your elbow bent at your side.
- Rotate your arm outwards in a slow and controlled manner.
- Slowly return your arm to your side and repeat.
- Make sure to squeeze your shoulder blades together when you pull your elbow back.
- Start by lying on your side on a firm, flat surface.
- Place your unaffected arm under you, cradling your head.
- Hold your injured arm against your side, with your elbow bent at a 90° angle.
- From this position, keep your elbow against your side and slowly rotate your injured arm to raise the weight to a vertical position.
- Slowly lower the weight back down, counting to 5 as you do so.
When you first start this exercise, aim for 3 sets of 8 repetitions. As you become stronger, increase the number of reps to 12. You should do this exercise 3 days per week.
This works the muscles at the front of your upper arm. To do this exercise, you will need a weight that allows you to perform 3 sets of 8 repetitions.
- Stand with your feet shoulder-width apart.
- With the elbow close to your side, slowly bring the weight up to your shoulder.
- Hold for 2 seconds, then slowly lower it back down.
- Be sure to do the exercise slowly and not swing your arm.
- Repeat
You can slowly increase the weight up to a maximum of 15 pounds. Once you increase the weight, start again with 3 sets of 8 reps. Do this 3 times a week.
This exercise is designed to strengthen the triceps muscles at the back of your upper arm. To do this exercise, you'll need a weight that allows you to complete 3 sets of 8 repetitions.
- Start by standing tall with your weight evenly distributed on both feet.
- Raise one arm and bend your elbow, holding the weight behind your head.
- To support your arm, place the opposite hand on your upper arm.
- Slowly bring the weight over your head by straightening your elbow.
- Hold for 2 seconds, then slowly lower the weight down behind your head and repeat.
- Remember to keep your abdominal muscles tight and avoid arching your back during the exercise.
You can gradually increase the weight by adding 1-pound increments up to a maximum of 10 pounds. Each time you increase the weight, return to 3 sets of 8 repetitions.
You can also check out our article on exercises to strengthen your trapezius and neck muscles.
Takeaway
Whether you’re a gym rat or just started going to the gym, pain at the back of your shoulder after bench pressing is never a good sign. It may mean you’re doing your workouts with improper form or too heavy weights. It may also mean you have muscle imbalances or, worse, an underlying injury.
Always observe proper form and technique to avoid shoulder pain and maximize your workouts. And don’t overwork yourself! Always allow adequate time for rest and recovery in between your workouts.
If you are unsure of the cause of your pain and how to address it, there’s nothing wrong with asking for advice from a personal trainer or coach. They can help you develop a safe and effective workout plan.
Remember, there’s no shame in prioritizing your health and safety at the gym. Happy Lifting!
